> ## Documentation Index
> Fetch the complete documentation index at: https://docs.harogo.ai/llms.txt
> Use this file to discover all available pages before exploring further.

# Codex CLI

> 本指南将帮助您在几分钟内使用由 Harogo 提供的 Codex。

## 安装

### 官网下载（macOS 版本）

[https://openai.com/zh-Hans-CN/codex/](https://openai.com/zh-Hans-CN/codex/)

### 使用命令行安装

```bash theme={null}
npm install -g @openai/codex
```

## 环境变量配置

### 使用配置文件配置

1. 修改 ` ~/.codex/config.toml` 配置文件，增加如下配置：

```toml theme={null}
profile = "harogo"

[model_providers.aihubmix]
name = "harogo"
base_url = "https://api.harogo.ai/v1"
personality = "pragmatic"
wire_api = "responses"

[profiles.aihubmix]
model = "gpt-5.6-sol"
model_provider = "harogo"
model_reasoning_effort = "high"
```

2. 修改 ` ~/.codex/auth.json` 配置文件，修改如下配置：

```json theme={null}
{
  "OPENAI_API_KEY": "HAROGO_API_KEY"
}
```

### 通过 cc-switch 配置

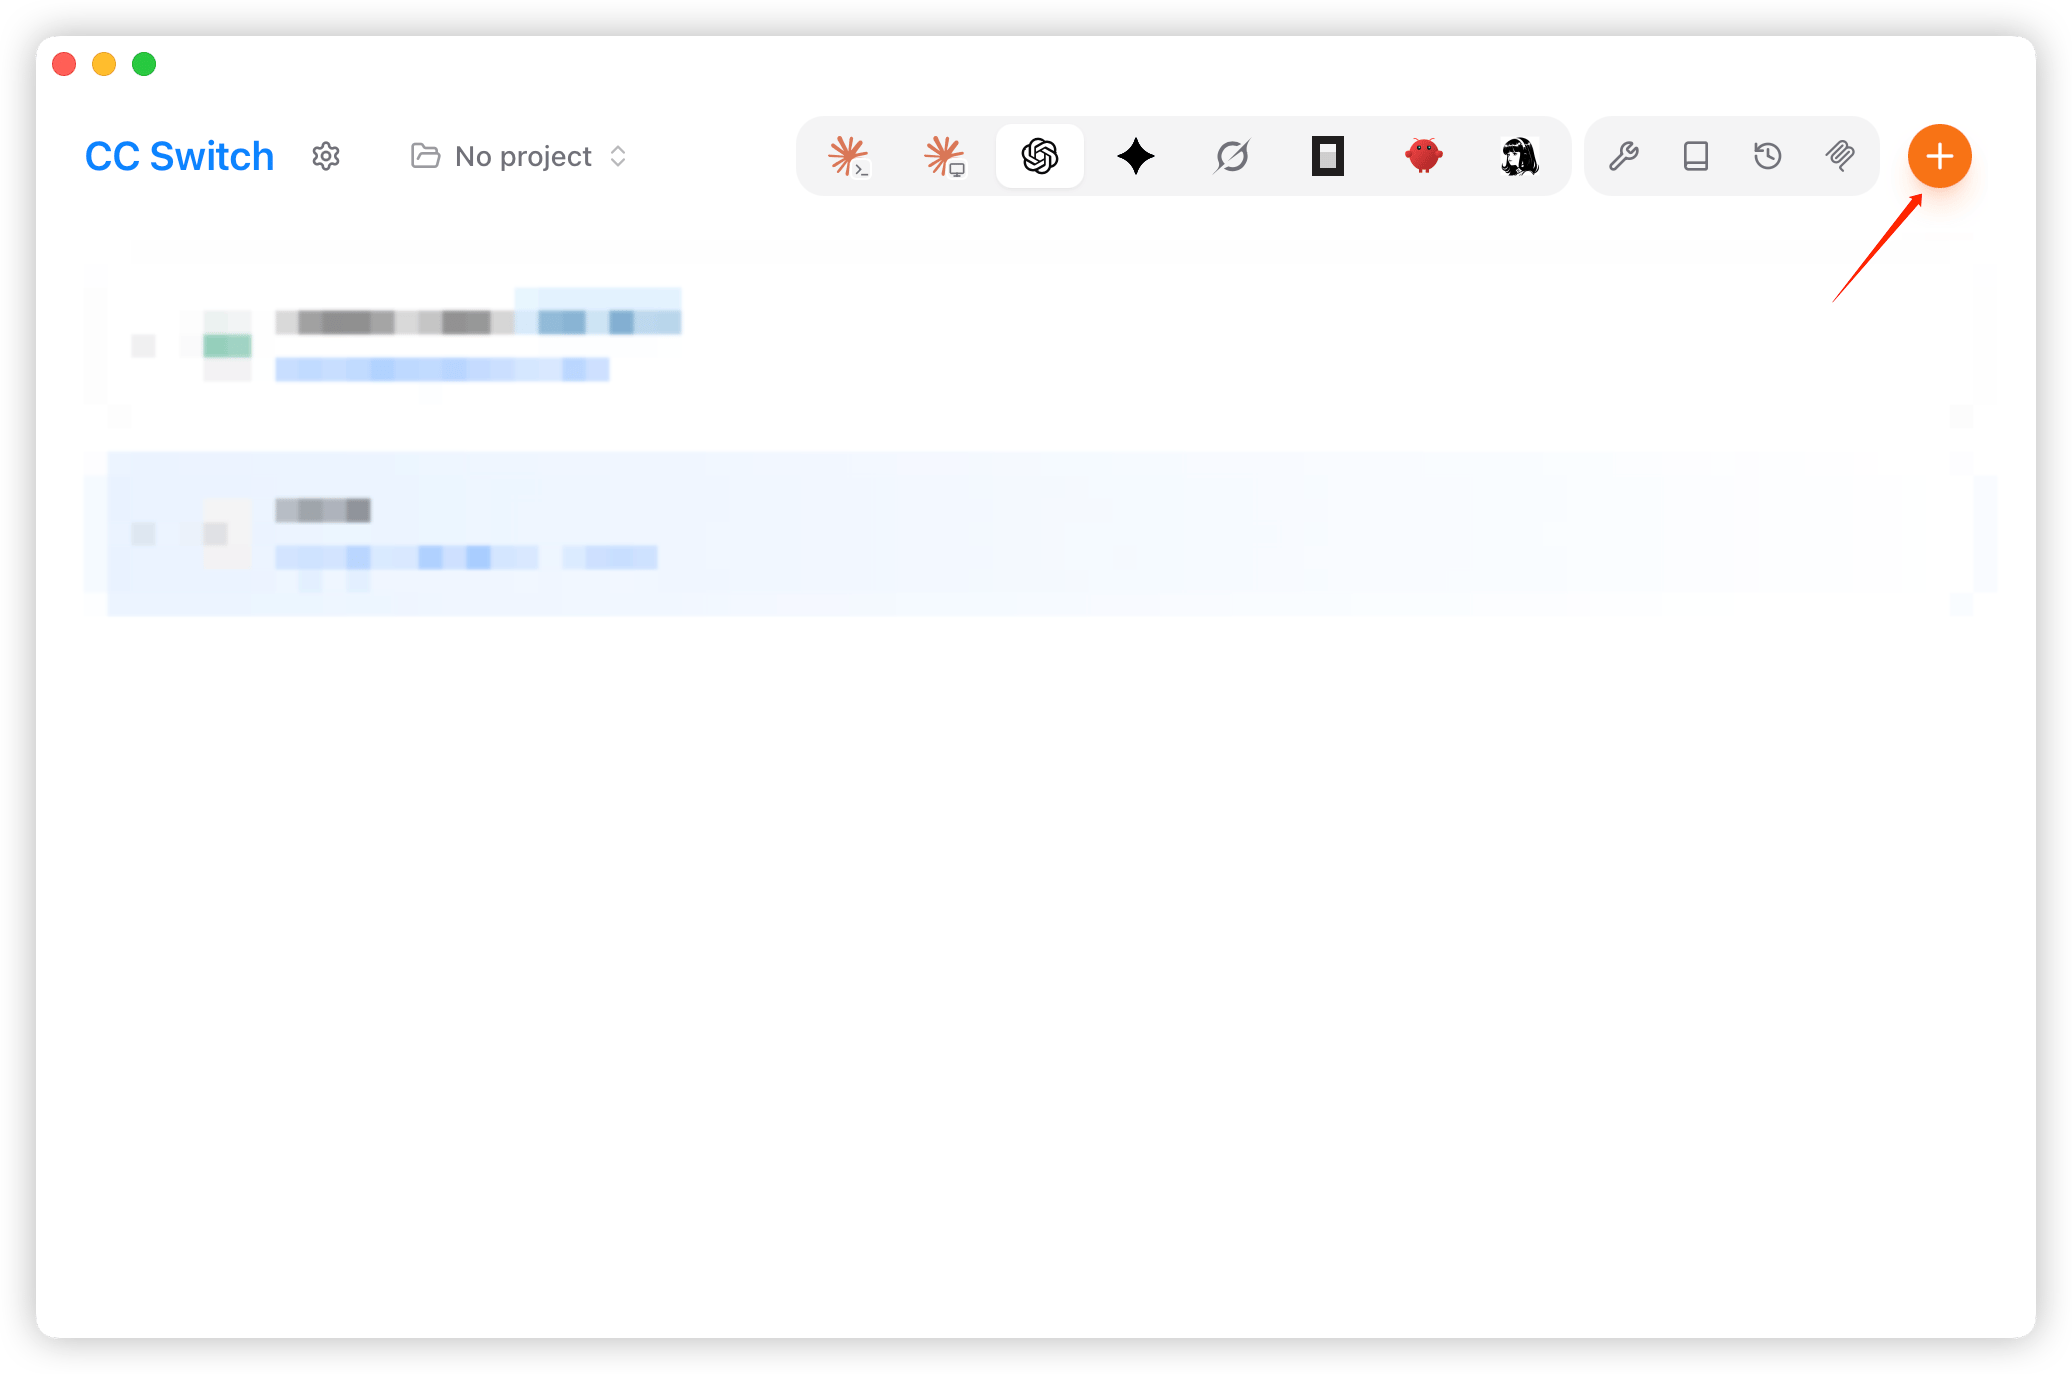
1. 运行 CC-Switch，添加供应商。

<img alt="CC-Switch 添加供应商界面" width="2072" height="1374" data-path="public/cn/codex-1.png" lightAlt="CC-Switch 添加供应商界面" darkAlt="CC-Switch 添加供应商界面" src="https://mintcdn.com/harogo/qRGxspke-hSrHYFQ/images/iShot_2026-08-07_17.20.12.png?fit=max&auto=format&n=qRGxspke-hSrHYFQ&q=85&s=5060b1dd3183503d4e17c9a0f0b45582" data-path="images/iShot_2026-08-07_17.20.12.png" />

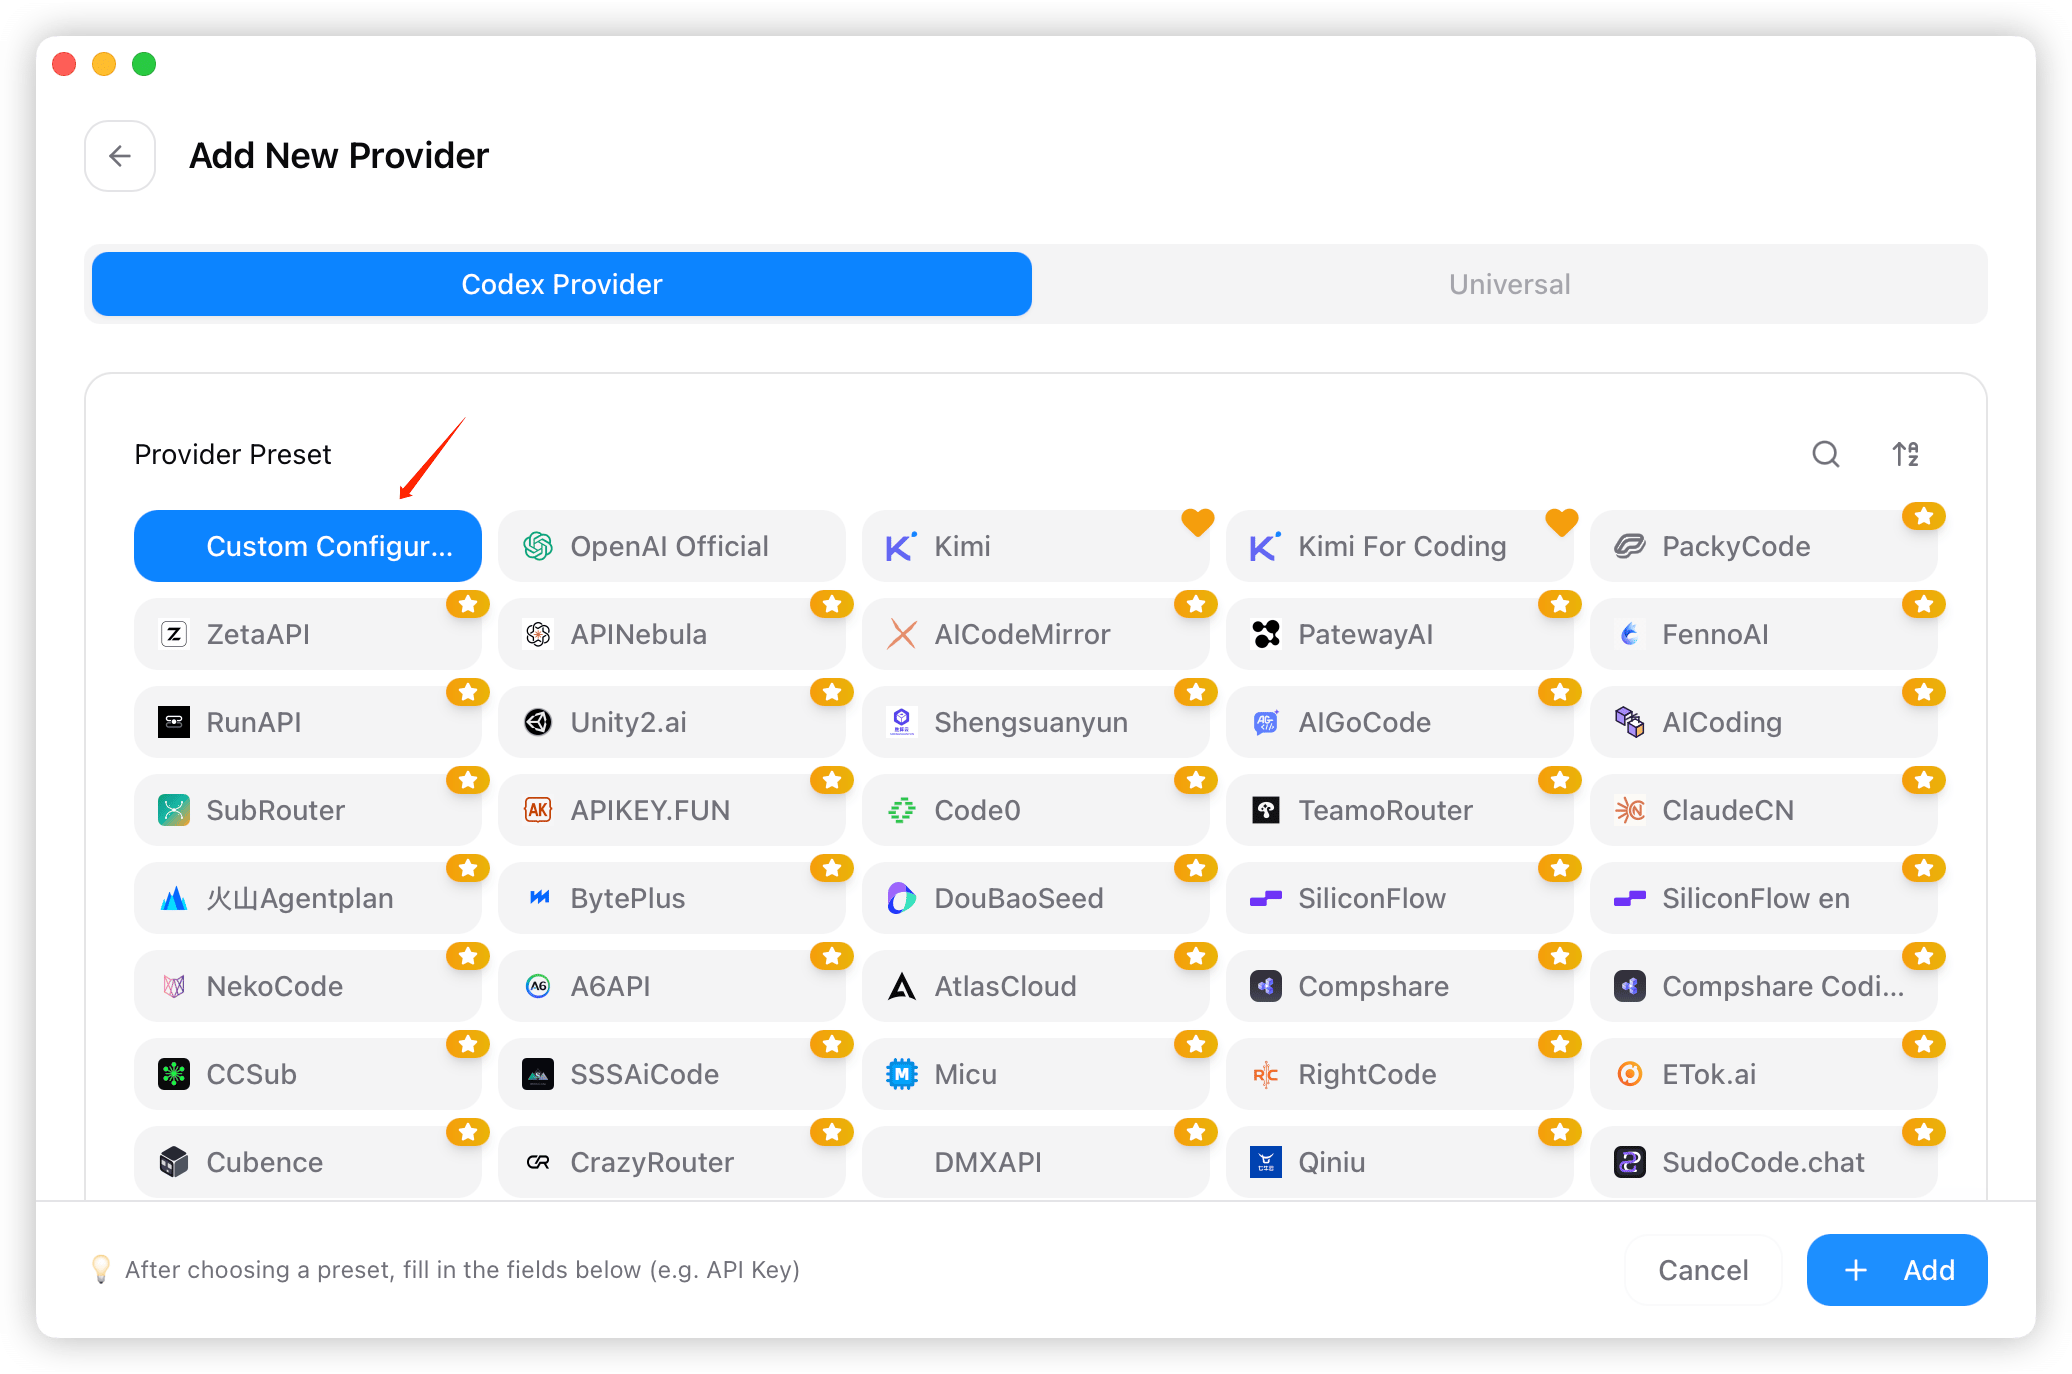
2. 在预设列表中选择「自定义配置」。

<img alt="在 CC-Switch 预设列表选择 AiHubMix" width="2072" height="1374" data-path="public/cn/codex-2.png" lightAlt="在 CC-Switch 预设列表选择 AiHubMix" darkAlt="在 CC-Switch 预设列表选择 AiHubMix" src="https://mintcdn.com/harogo/qRGxspke-hSrHYFQ/images/iShot_2026-08-07_17.20.35.png?fit=max&auto=format&n=qRGxspke-hSrHYFQ&q=85&s=d6af8de96d38eea8a2bbf88d9b28353a" data-path="images/iShot_2026-08-07_17.20.35.png" />

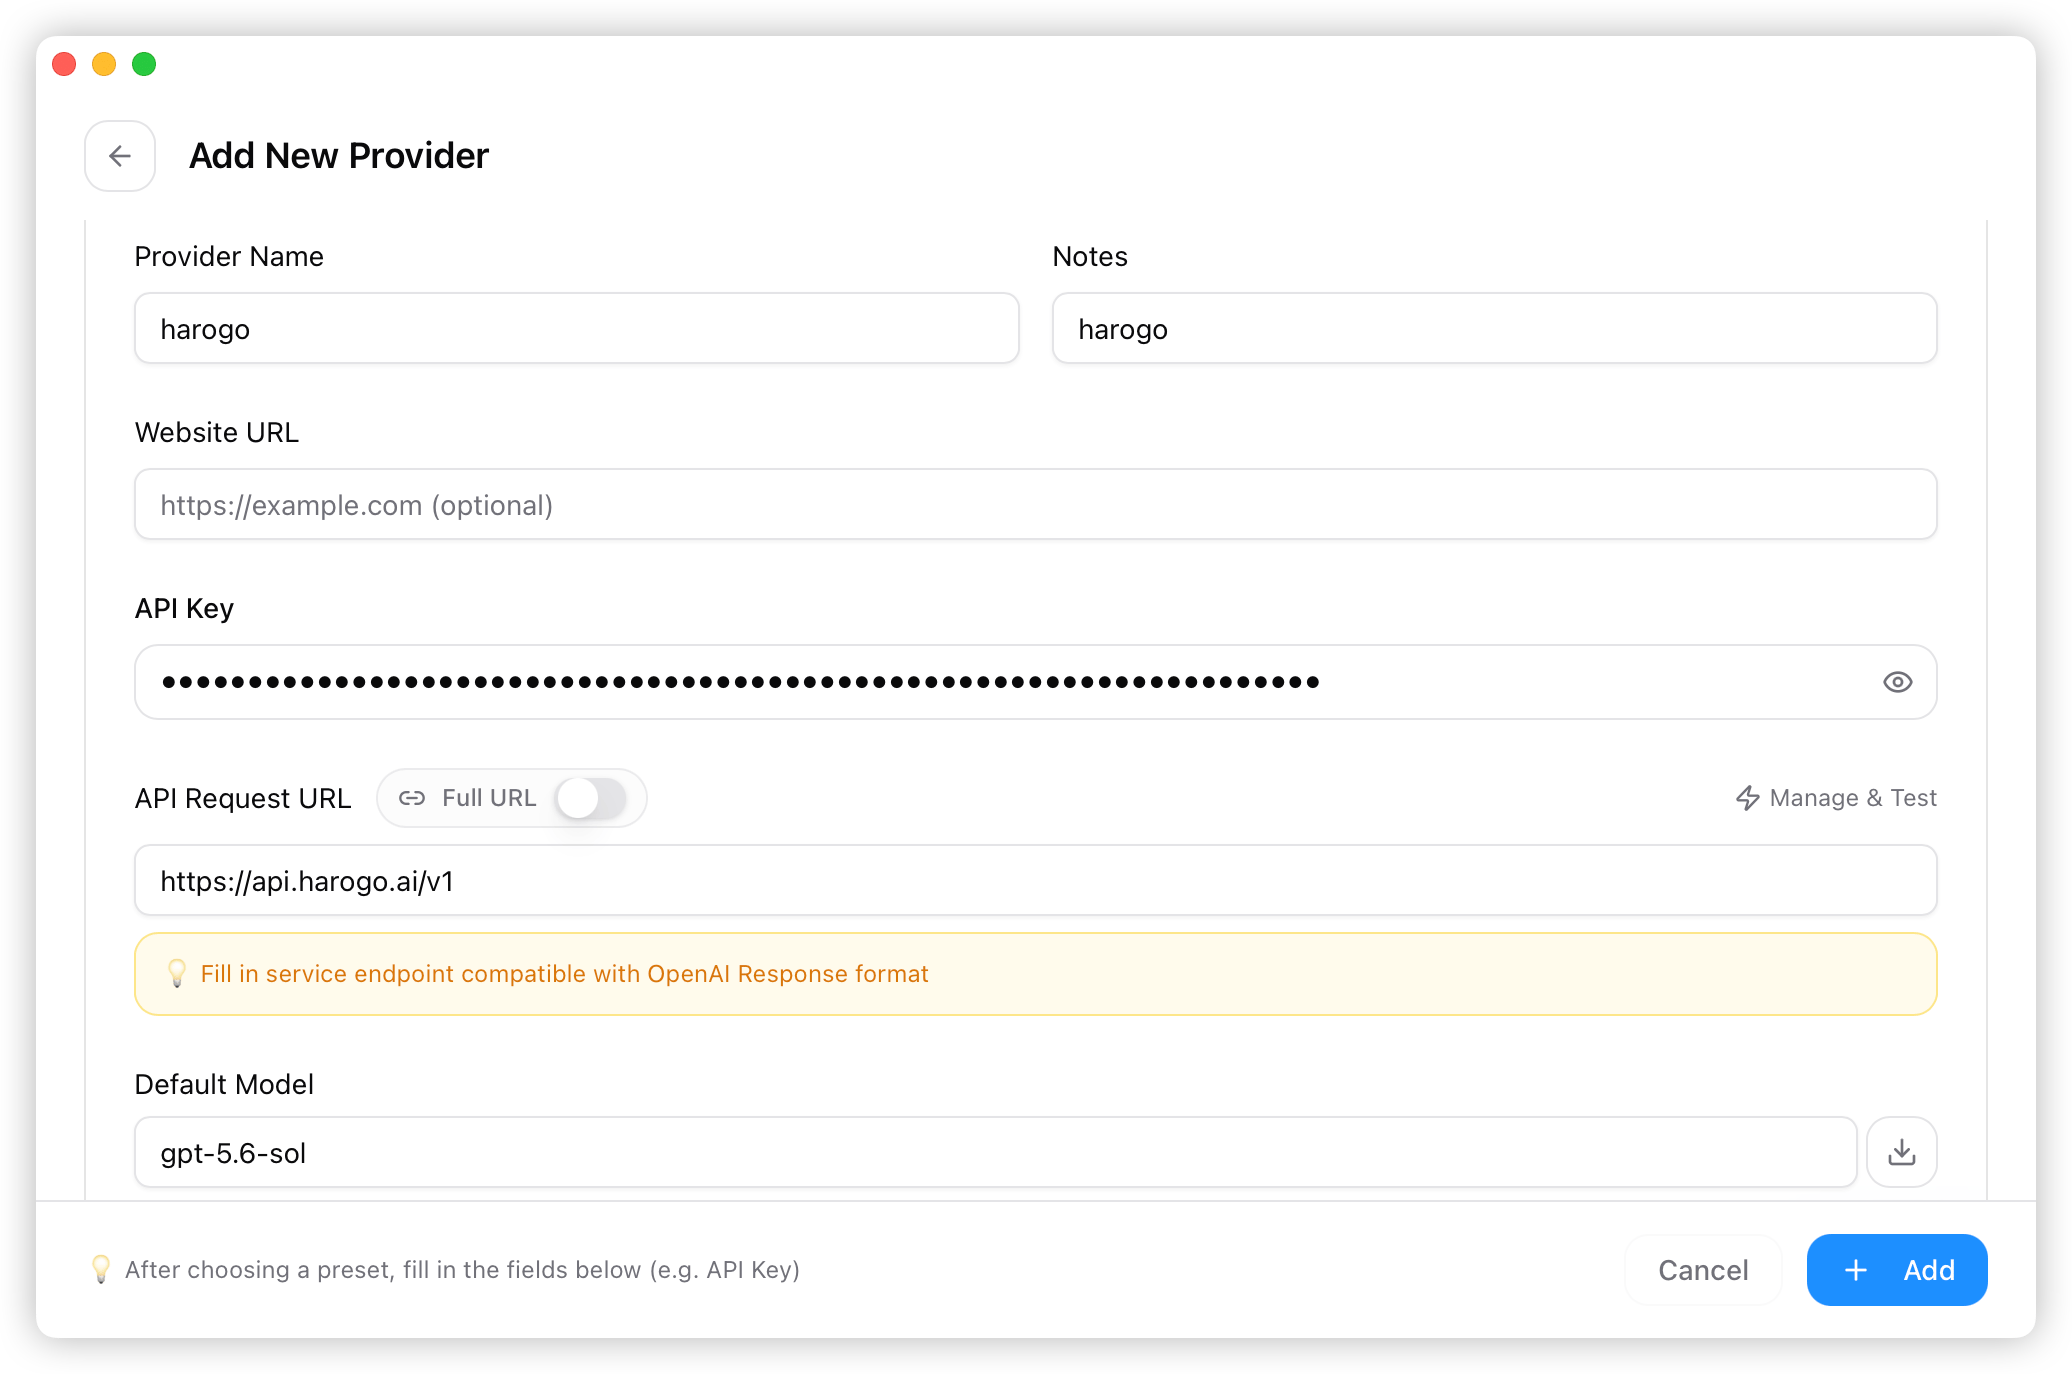
3. 填写供应商名称、API Key、端点「[https://api.harogo.ai/v1」等信息。信息填写完整后，点击「添加」即可。](https://api.harogo.ai/v1」等信息。信息填写完整后，点击「添加」即可。)

<img alt="在 CC-Switch 填写 API Key 并保存" width="2072" height="1374" data-path="public/cn/codex-3.png" lightAlt="在 CC-Switch 填写 API Key 并保存" darkAlt="在 CC-Switch 填写 API Key 并保存" src="https://mintcdn.com/harogo/qRGxspke-hSrHYFQ/images/iShot_2026-08-07_17.22.08.png?fit=max&auto=format&n=qRGxspke-hSrHYFQ&q=85&s=ba2c9e8186f258bbe59faf11ca7a5a72" data-path="images/iShot_2026-08-07_17.22.08.png" />

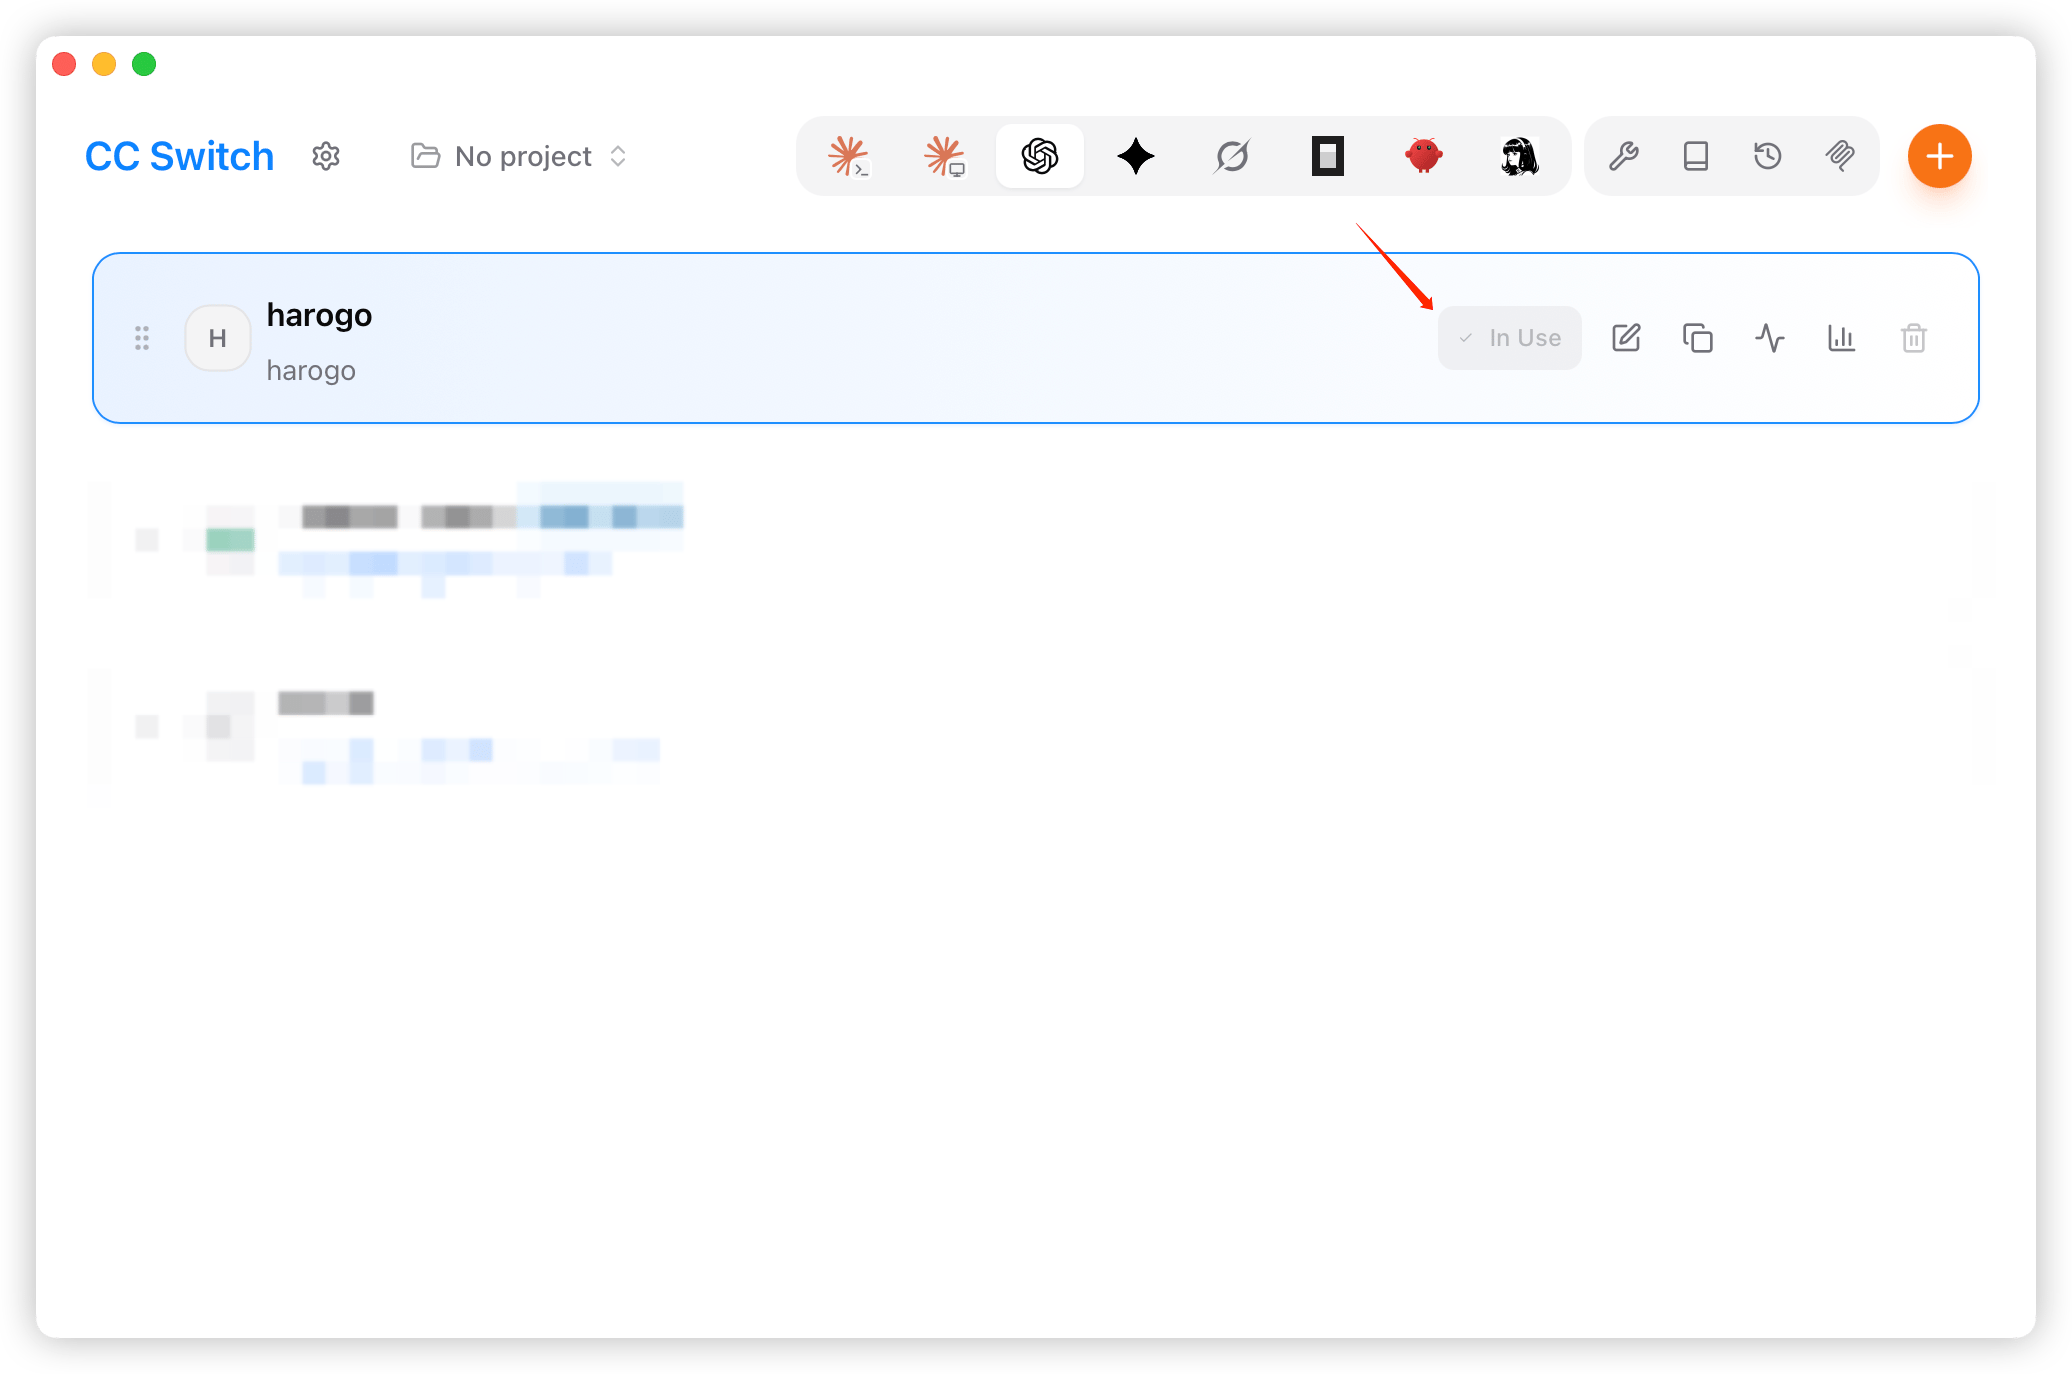
4. 返回首页，选择「harogo」，点击「启用」即可使用。

<img alt="在 CC-Switch 启用 AiHubMix 供应商" width="2072" height="1374" data-path="public/cn/codex-4.png" lightAlt="在 CC-Switch 启用 AiHubMix 供应商" darkAlt="在 CC-Switch 启用 AiHubMix 供应商" src="https://mintcdn.com/harogo/qRGxspke-hSrHYFQ/images/iShot_2026-08-07_17.27.33.png?fit=max&auto=format&n=qRGxspke-hSrHYFQ&q=85&s=622cdd174f4c73ac475f52151d066439" data-path="images/iShot_2026-08-07_17.27.33.png" />

## 使用 Codex

### 在终端中使用

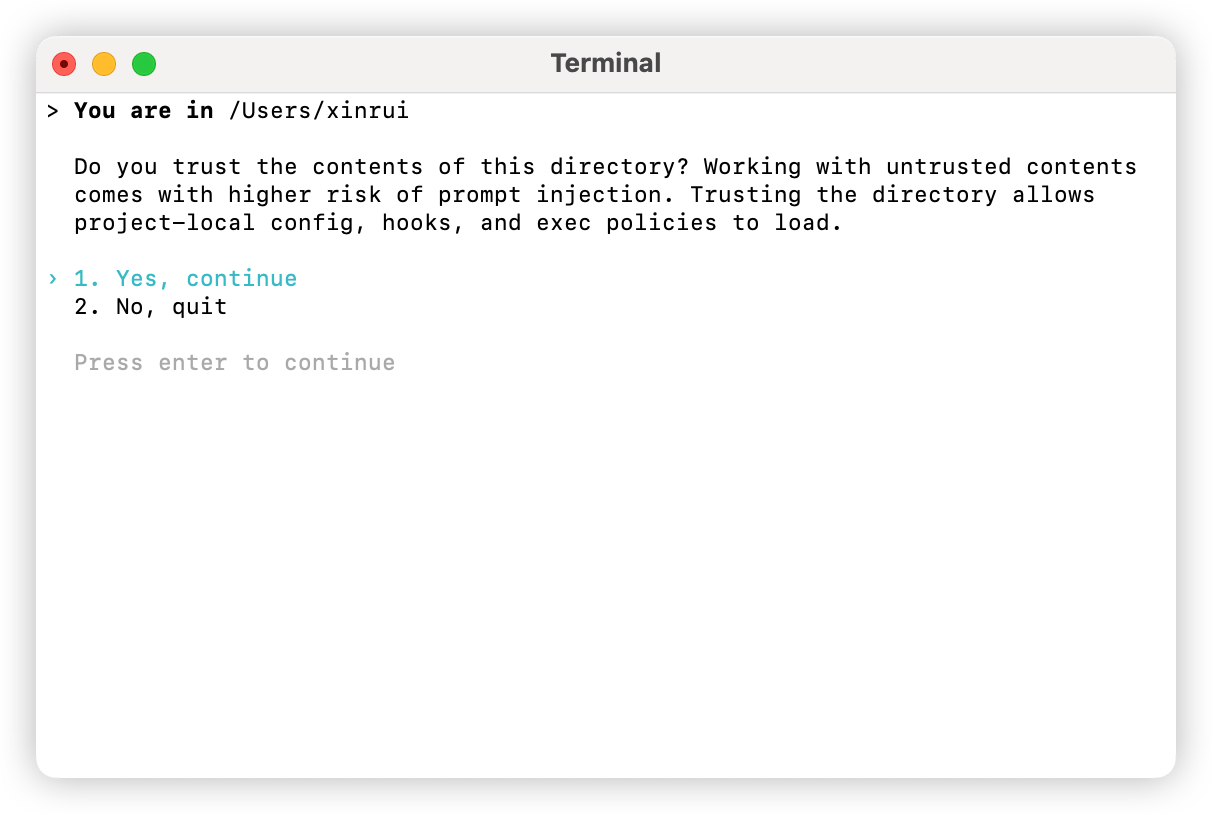
1. 打开终端，定位到你的项目目录，然后运行 `codex` 命令。

```bash theme={null}
cd /你的项目路径
codex
```

2. 根据需求，设置权限。

<img alt="Codex 启动时设置审批权限" width="1212" height="814" data-path="public/cn/codex-5.png" lightAlt="Codex 启动时设置审批权限" darkAlt="Codex 启动时设置审批权限" src="https://mintcdn.com/harogo/qRGxspke-hSrHYFQ/images/iShot_2026-08-07_17.31.13.png?fit=max&auto=format&n=qRGxspke-hSrHYFQ&q=85&s=2650c7b79afa5df66ed2705add331ebe" data-path="images/iShot_2026-08-07_17.31.13.png" />

3. 输入自然语言，若正常响应，则配置成功。