> ## Documentation Index
> Fetch the complete documentation index at: https://docs.harogo.ai/llms.txt
> Use this file to discover all available pages before exploring further.
# Codex CLI
> This guide will get you up and running with Codex powered by Harogo in just a few minutes.
## Installation
### Download from the official site (macOS)
[https://openai.com/codex/](https://openai.com/codex/)
### Install via the command line
```bash theme={null}
npm install -g @openai/codex
```
## Environment Variable Configuration
### Configure via the config file
1. Edit your `~/.codex/config.toml` file and add the following:
```toml theme={null}
profile = "harogo"
[model_providers.aihubmix]
name = "harogo"
base_url = "https://api.harogo.ai/v1"
personality = "pragmatic"
wire_api = "responses"
[profiles.aihubmix]
model = "gpt-5.6-sol"
model_provider = "harogo"
model_reasoning_effort = "high"
```
2. Edit your `~/.codex/auth.json` file and update it as follows:
```json theme={null}
{
"OPENAI_API_KEY": "HAROGO_API_KEY"
}
```
### Configure via cc-switch
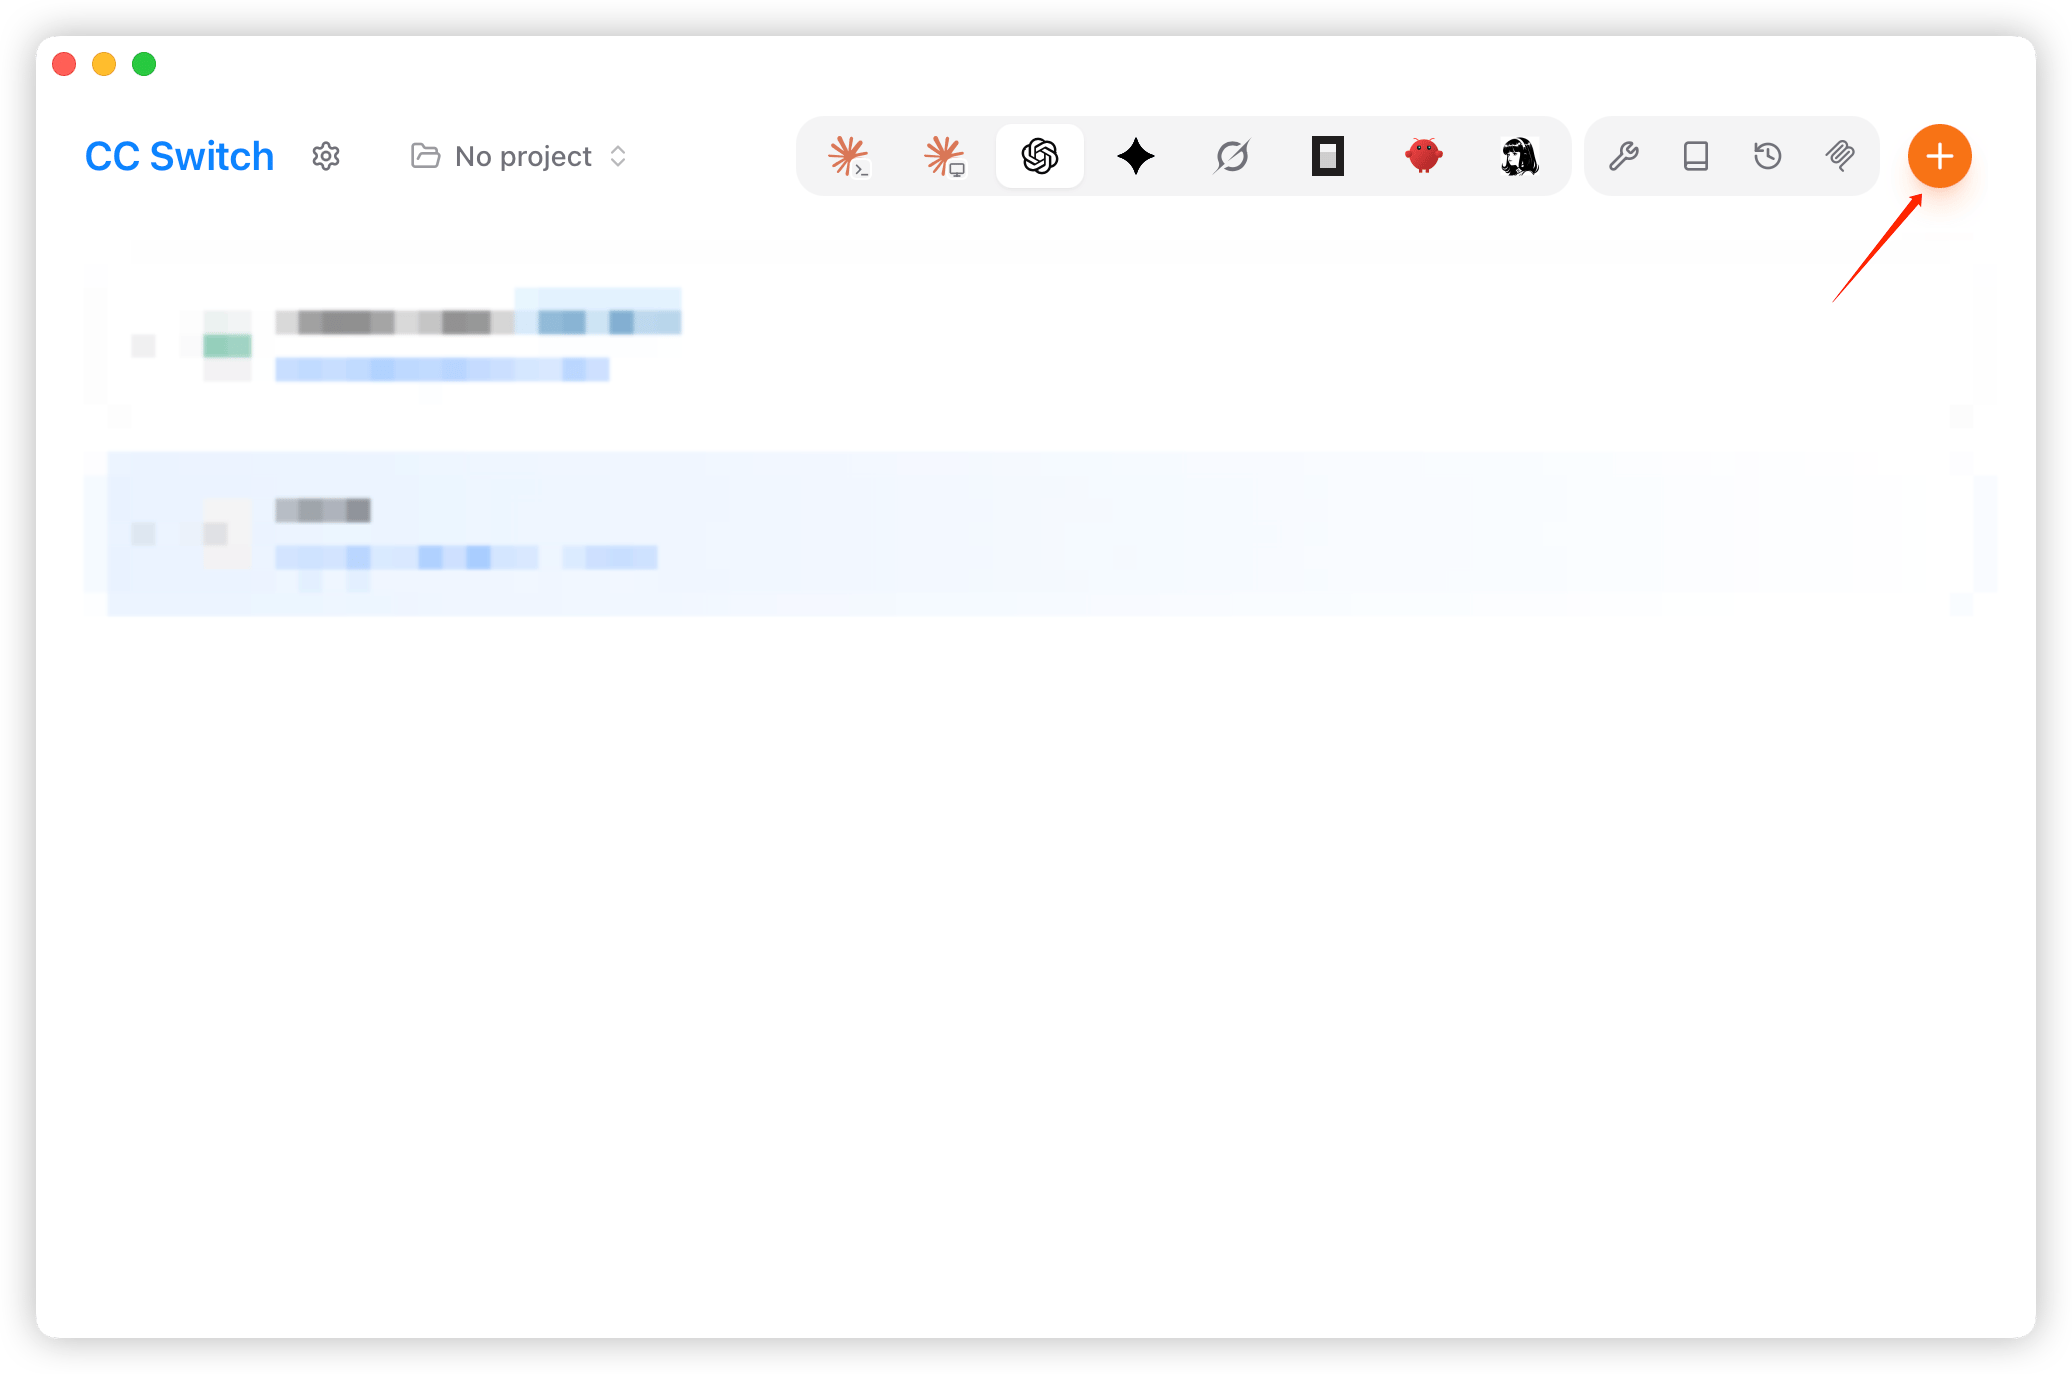
1. Launch CC-Switch and add a provider.
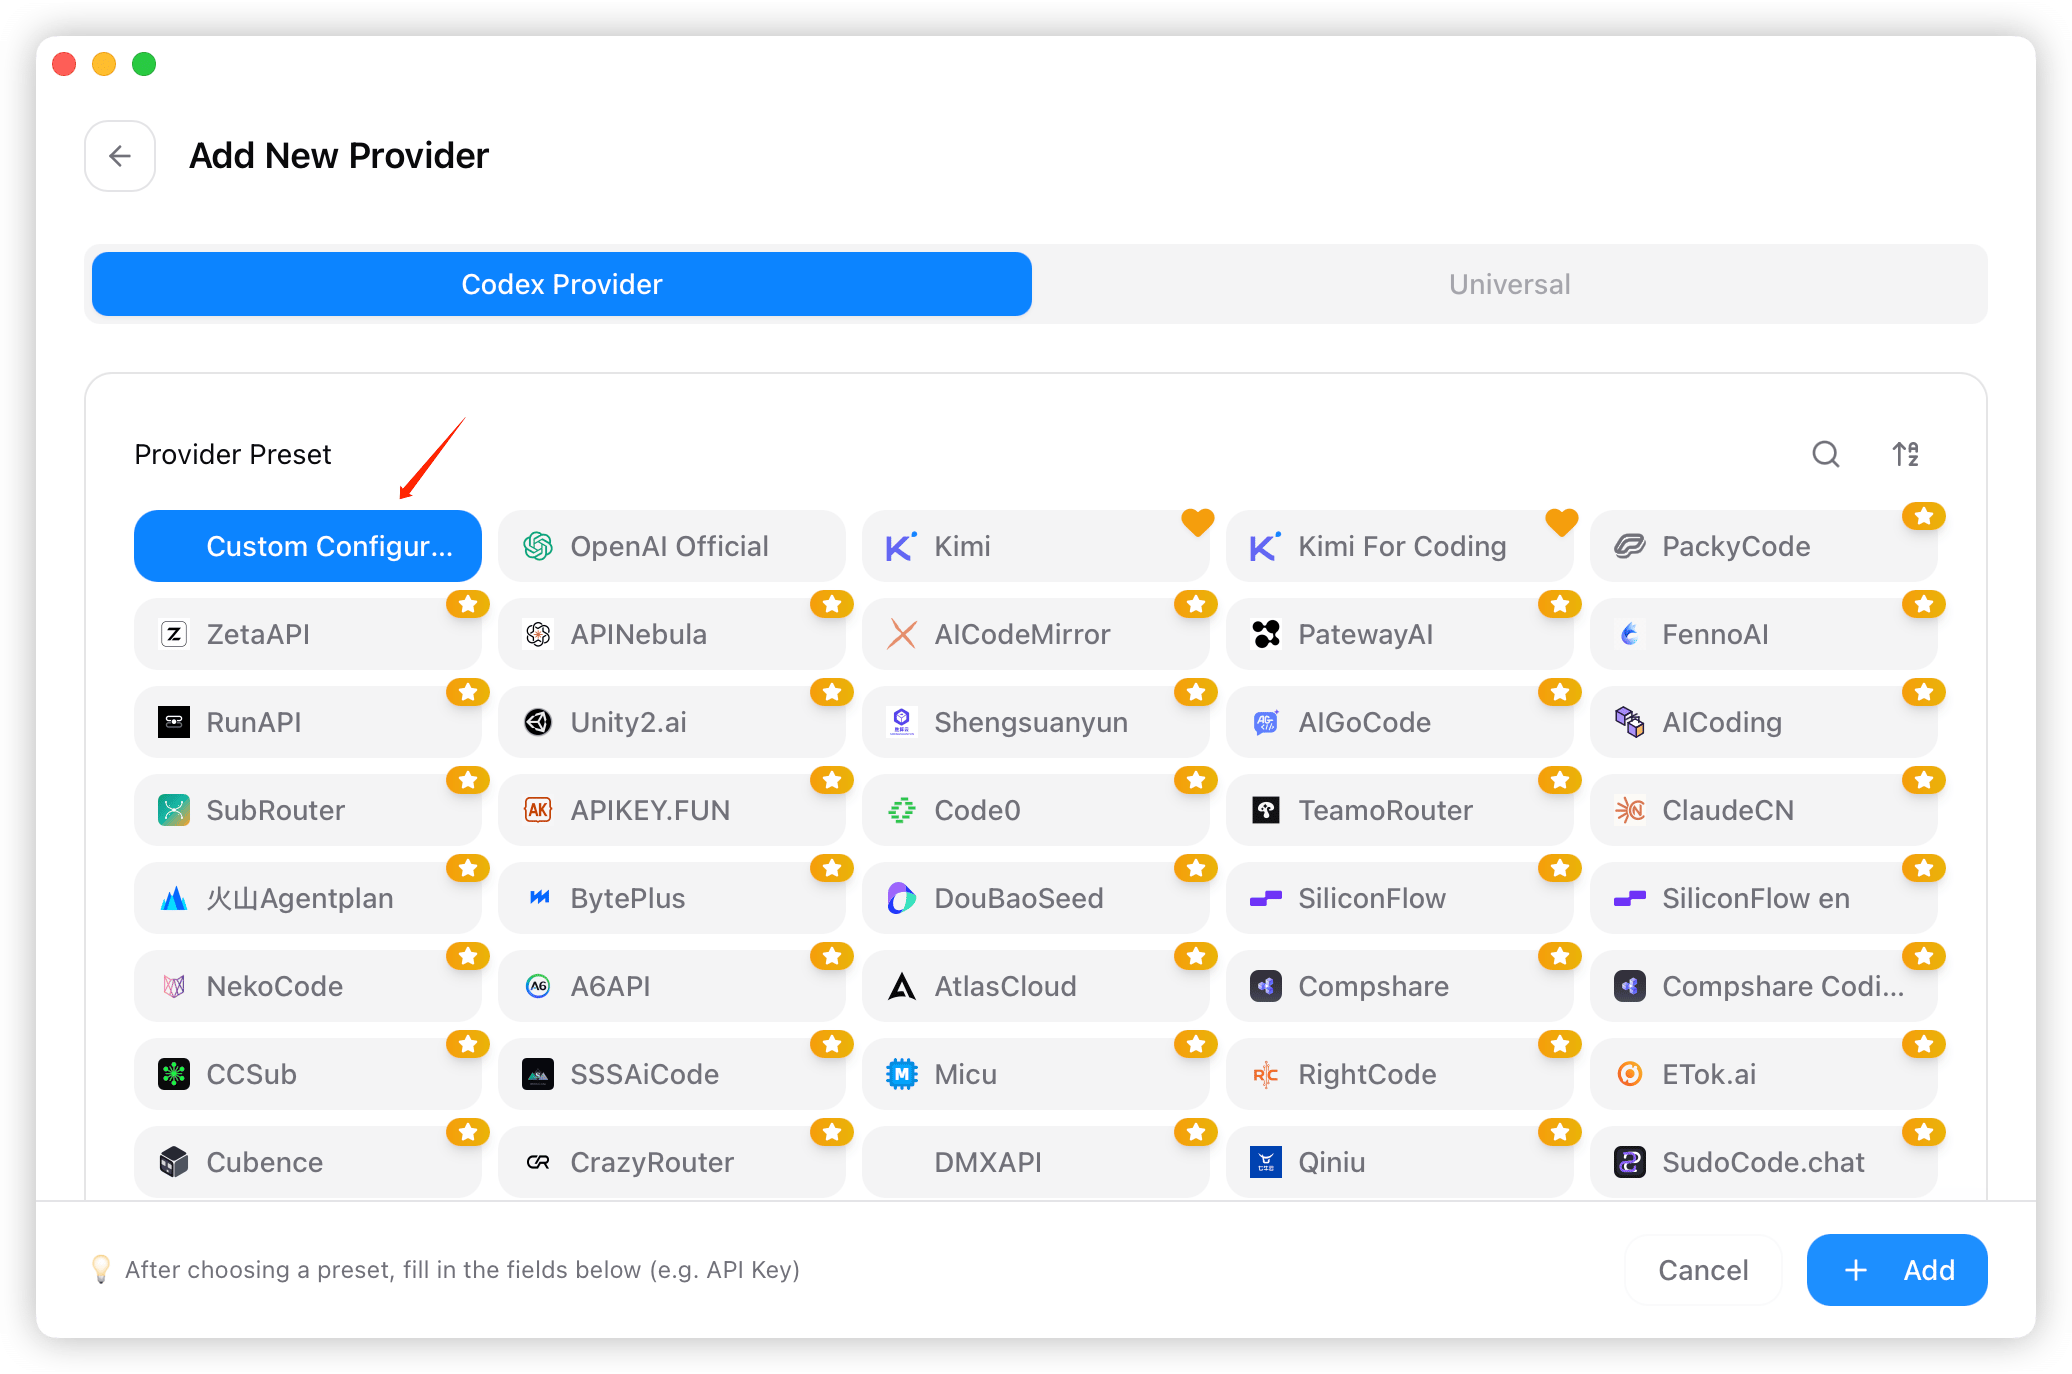
 2. From the preset list, choose "Custom Configuration."
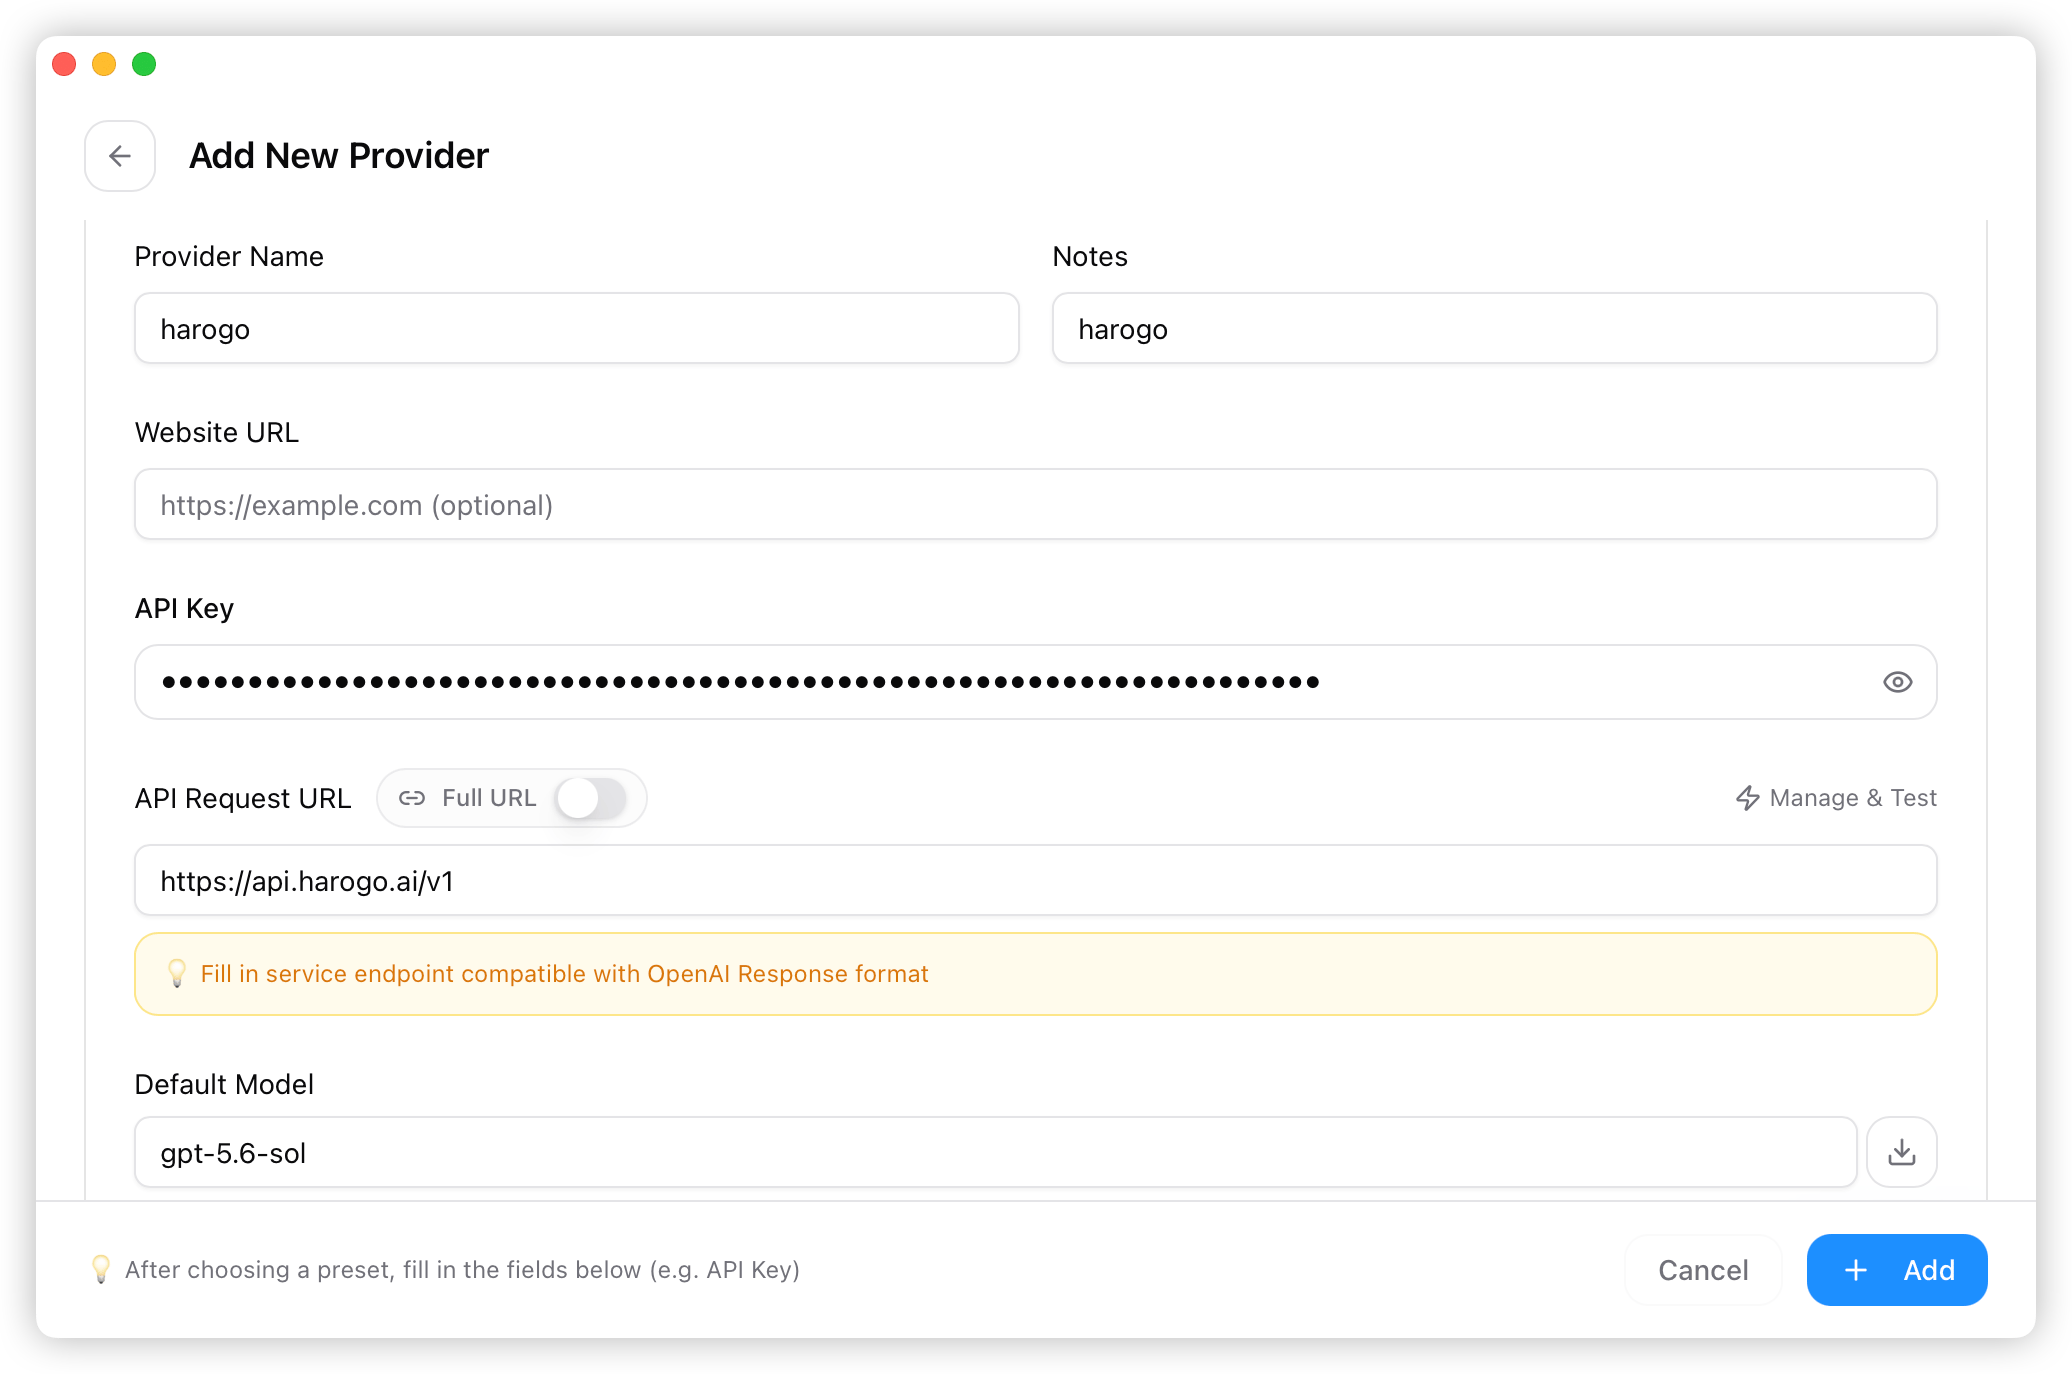
 3. Fill in the provider name, API key, and endpoint ([https://api.harogo.ai/v1](https://api.harogo.ai/v1)), etc. Once everything is filled in, click "Add."
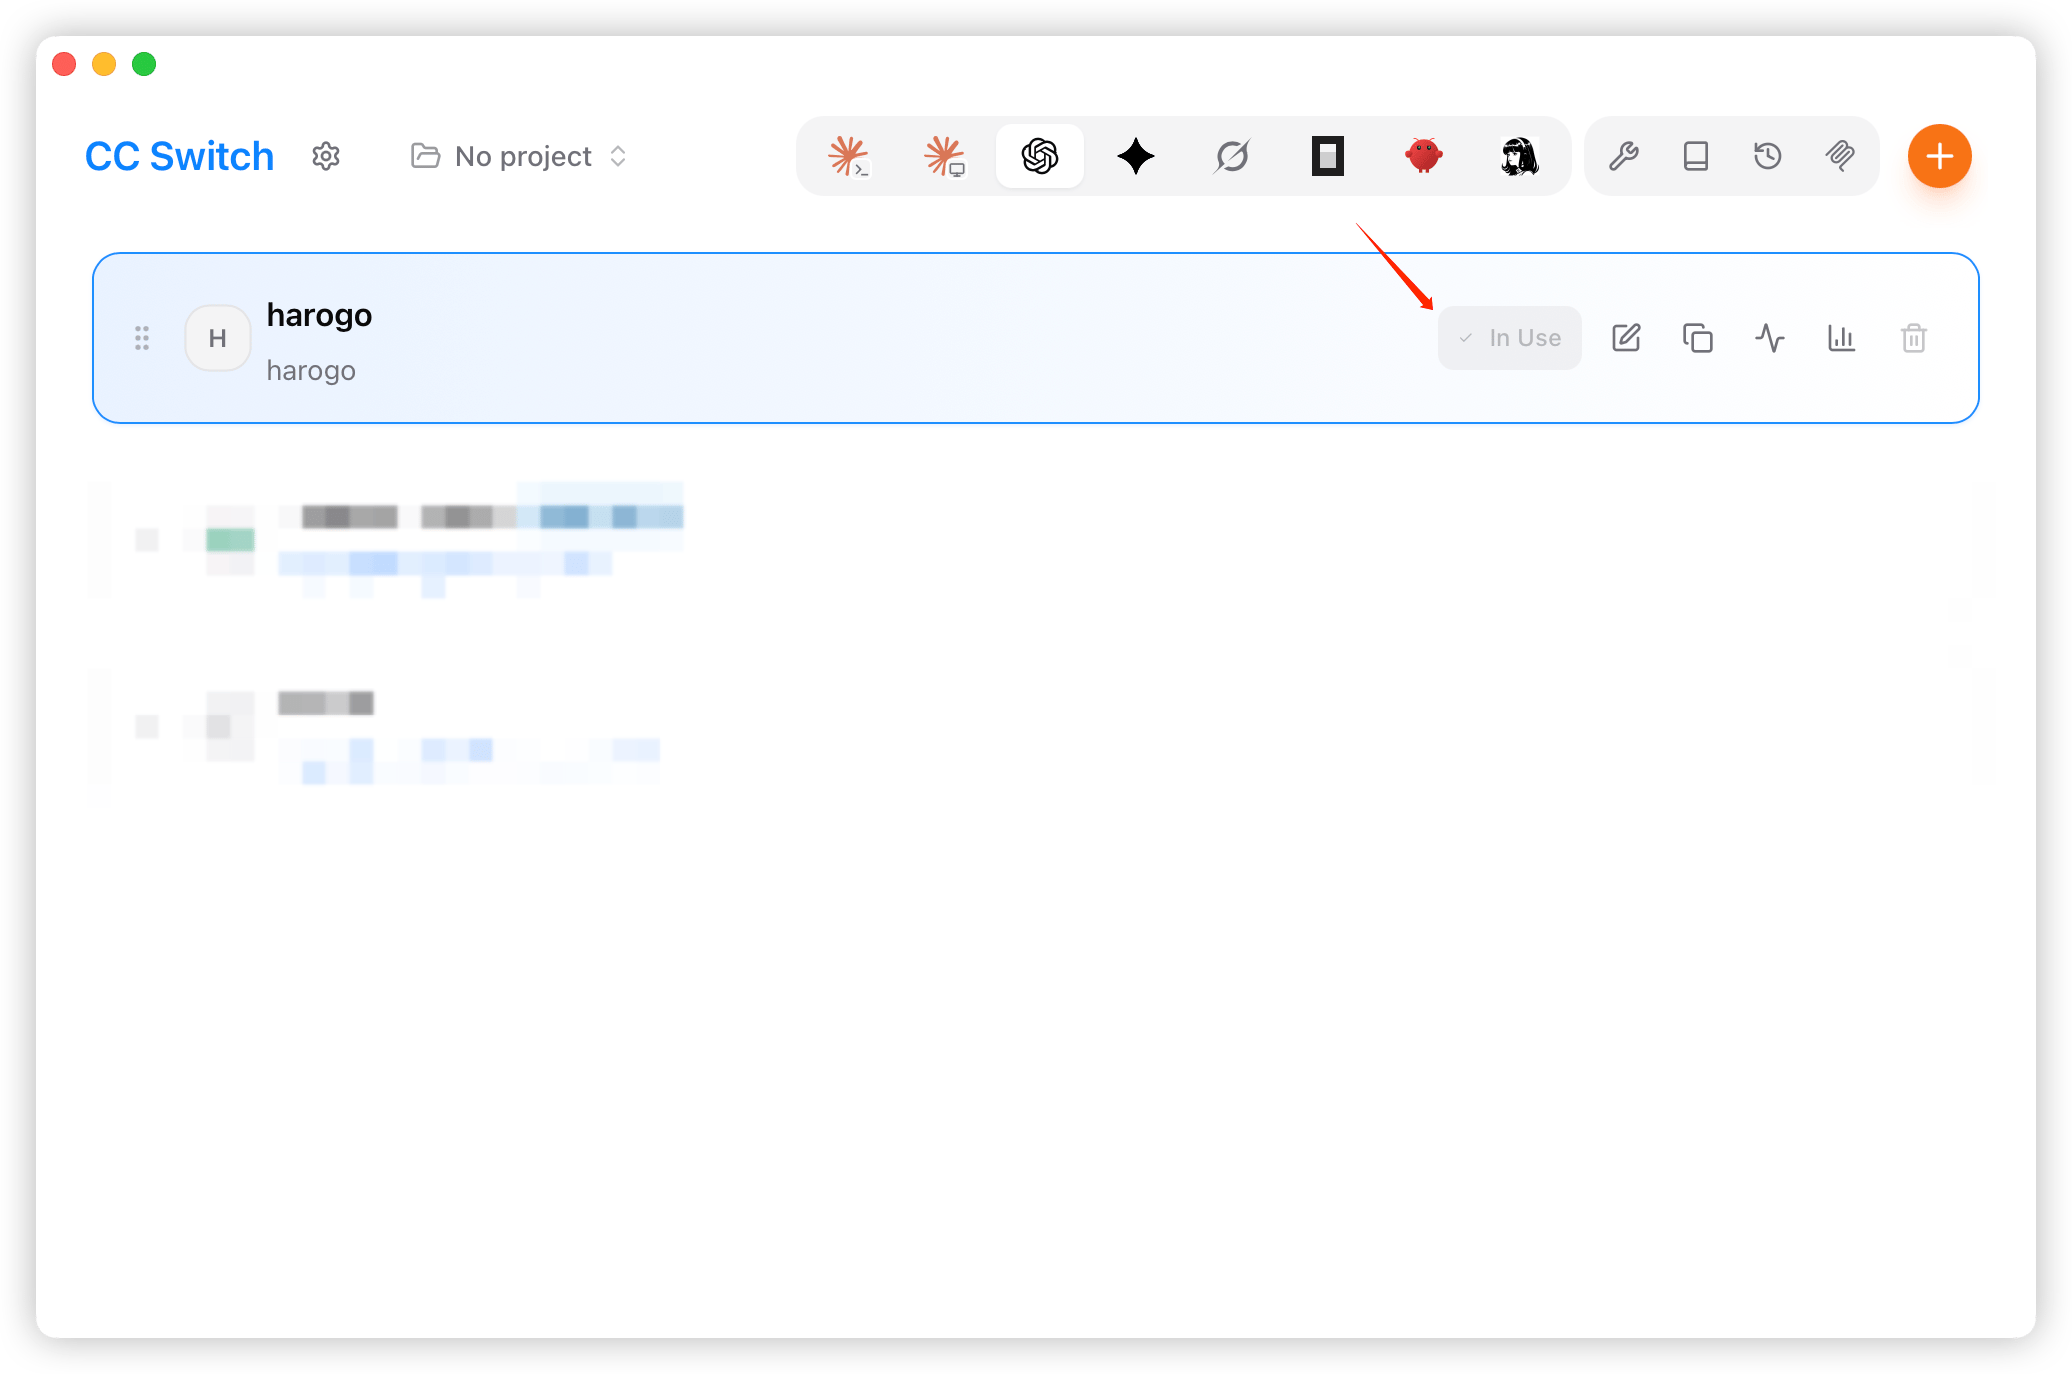
 4. Back on the home screen, select "harogo" and click "Enable" to start using it.
 ## Using Codex
### In the terminal
1. Open a terminal, navigate to your project directory, then run the `codex` command.
```bash theme={null}
cd /path/to/your/project
codex
```
2. Set permissions as needed.
## Using Codex
### In the terminal
1. Open a terminal, navigate to your project directory, then run the `codex` command.
```bash theme={null}
cd /path/to/your/project
codex
```
2. Set permissions as needed.
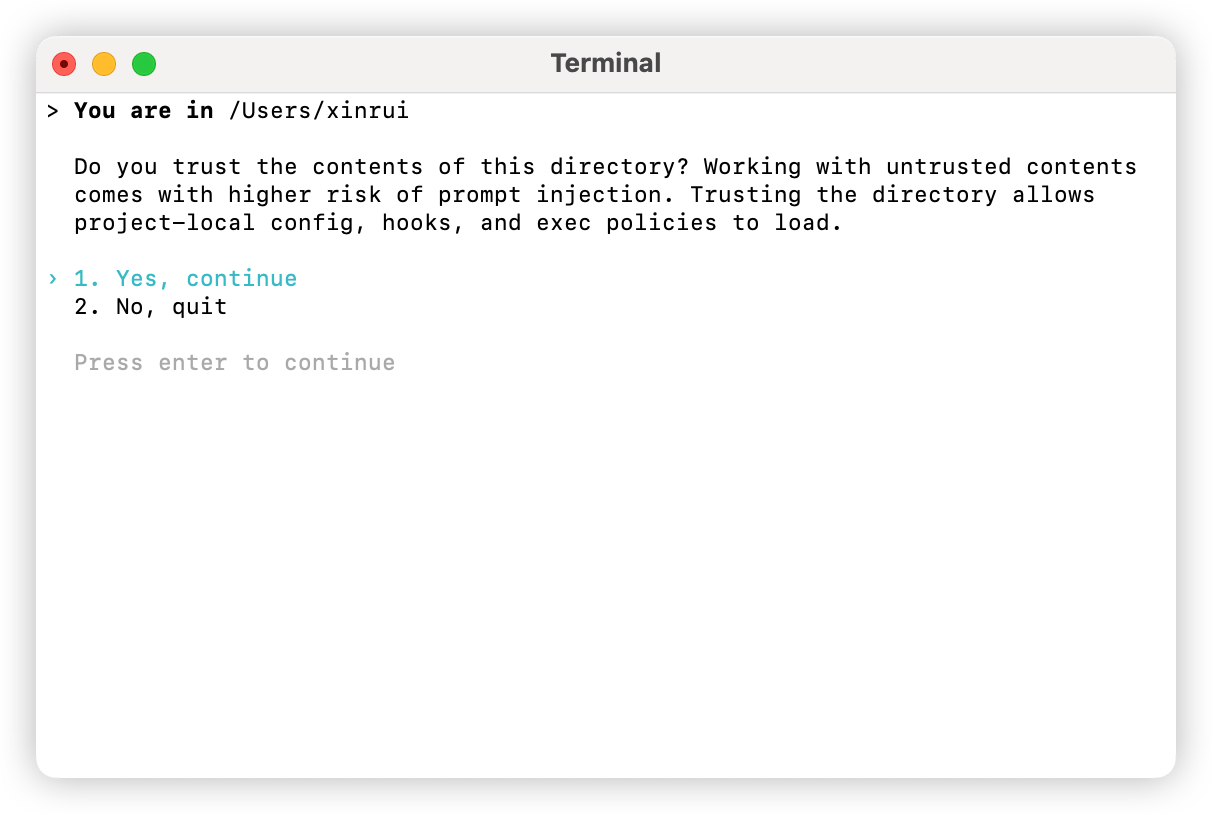 3. Type a natural-language prompt — if you get a normal response back, the setup was successful.